After downloading the project source from CodeCanyon, upload the Quick-Ecommerce.zip (or your provided zip file) to your web server directory and extract it.
This project can be installed on your main domain or a subdomain, depending on your se
Domain Structure Recommendation #
Since the admin panel (Laravel) and web frontend (Next.js) are built with different technologies, we strongly recommend:
- ✅ Web frontend (
Next.js) → installed on your main domain
Example:https://yourdomain.com - ✅ Admin panel (
Laravel) → installed on a subdomain
Example:https://admin.yourdomain.com
⚠️ Do not install the admin panel or frontend in a subdirectory like
yourdomain.com/folder.SSL Requirement: #
An SSL certificate is required for all system features (like authentication, secure APIs, payment). You can install a free SSL using:
👉 https://www.sslforfree.com
Installer Access (Laravel
Open your browser and go to either of these URLs:
https://your-domain.com
https://your-domain.com/public
Step 01: Starting the Installer #
Click “Get Started” and follow the installation wizard.
Visit your subdomain in the browser (e.g., https://admin.yourdomain.com)
You will be redirected to the installation page.

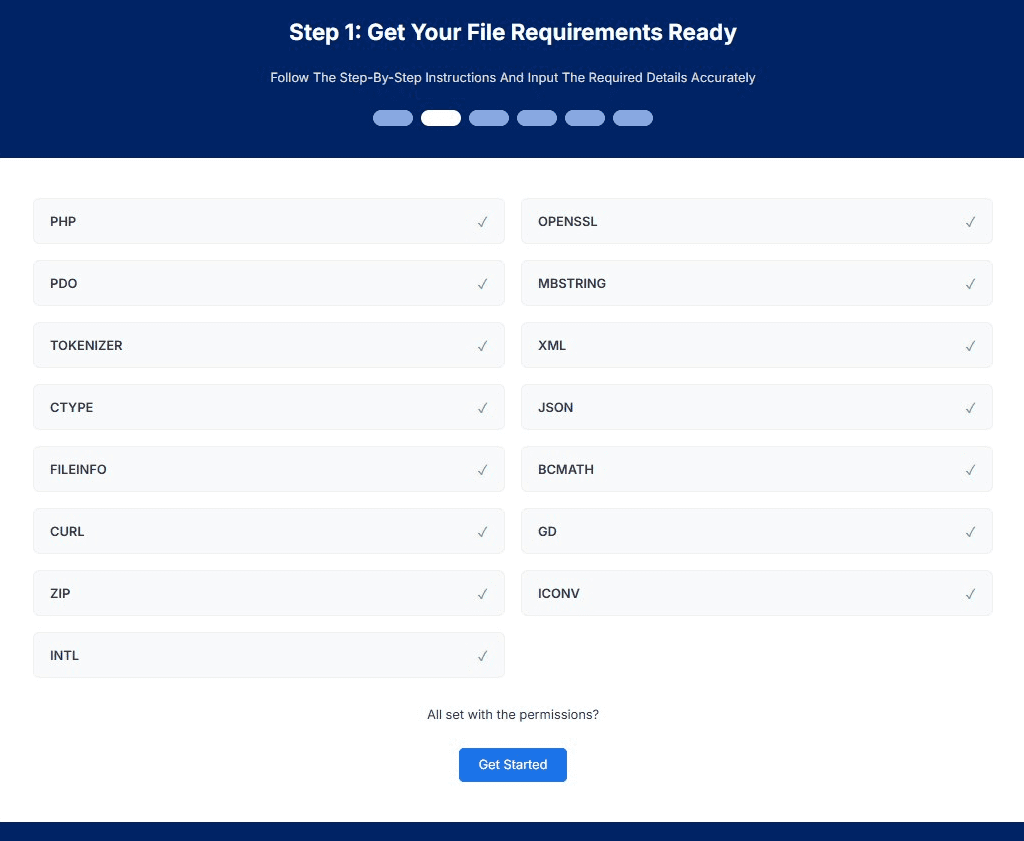
Step 02: System Requirements Check #
- The installer will check:
- PHP version & extensions.
#
Step 03: File Permissions Check #
File & folder permissions

Step 04. Database Configuration #
Enter your database credentials.
You’ll also see an option to Import Demo Data. Choose the option that fits your needs:
- Import demo data for testing and preview
- Skip demo data for a clean production setup
Once done, click Continue to proceed to the next step.

Step 05. Enter Admin Information #
Ensure that the information is accurate — this account will be used to access your admin dashboard after installation.
Click Create Admin to finalize the setup.

#
Step 06: Installation Complete #
Congratulations! Quick-Ecommerce is now installed and ready to use.


